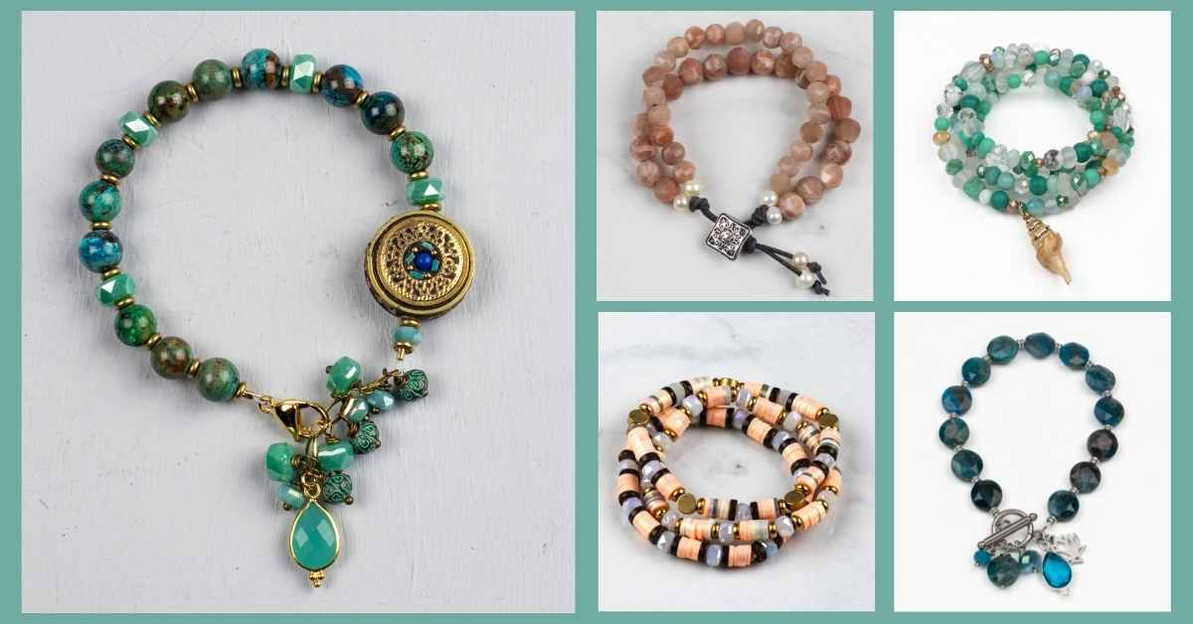
How to Make a Bracelet: Elastic, Memory Wire, Stringing Wire, and Leather
Creating your own bracelet is a fun and rewarding way to express your style and creativity. At Cherry Tree Beads, we provide a wide range of materials and supplies, including beads and stringing cords, to help you craft beautiful, unique bracelets. Whether you’re a beginner or an experienced jewelry maker, you can create stunning bracelets using elastic, memory wire, stringing wire, or leather. Here’s a basic step-by-step guide on how to make bracelets using each of these materials.
1. Elastic Bracelets Elastic bracelets are simple to make and perfect for beginners. They are stretchy, making them easy to wear and remove.
Materials Needed:
- Elastic cord
- Beads of your choice
- Scissors
- Bead stopper or tape
- Optional: Charms or pendants
Steps:
- Measure and Cut: Measure your wrist and cut a piece of elastic cord that is about 2-3 inches longer than your wrist size.
- Pre-Stretch Elastic: Pre-stretch the elastic cord to prevent your bracelet from stretching out over time.
- Secure One End: Attach a bead stopper or tape to one end of the elastic to prevent beads from sliding off.
- String Beads: String your beads onto the elastic cord in the desired pattern. Add any charms or pendants if you like.
- Test the Fit: Wrap the bracelet around your wrist to check the fit. Adjust the number of beads if necessary.
- Secure the Ends: Once satisfied with the fit, tie a secure knot. For extra security, you can add a drop of jewelry glue on the knot.
- Trim Excess: Trim any excess elastic cord.
2. Memory Wire Bracelets
Memory wire bracelets are durable and maintain their shape, making them a great option for stackable designs.
Materials Needed:
- Memory wire
- Beads of your choice
- Memory wire cutters
- Round nose pliers or memory wire end caps and glue
- Optional: Charms or pendants
Steps:
- Cut Wire: Cut a piece of memory wire that wraps around your wrist 2-3 times.
- Secure One End: Use round nose pliers to create a small loop at one end of the wire to prevent beads from sliding off, or use memory wire end caps and glue them on.
- String Beads: String your beads onto the memory wire in the desired pattern. Add any charms or pendants if you like.
- Finish with a Loop or End Cap: Once all beads are strung, use pliers to create another loop at the other end of the wire, or secure with an end cap.
- Adjust and Enjoy: Adjust the loops if necessary, and your memory wire bracelet is ready to wear.
3. Stringing Wire Bracelets
Stringing wire bracelets are versatile and can be made with a variety of beads and findings. The size of the stringing wire you use should match the size of your beads and the weight of your design.
Materials Needed:
- Stringing wire (0.014 to 0.024 inches depending on bead size)
- Beads of your choice
- Crimp tubes
- Crimping tool
- Clasp
- Wire cutters
- Optional: Bead caps, spacer beads
Steps:
- Cut Wire: Measure your wrist and cut a piece of stringing wire about 6 inches longer than your wrist size.
- Attach Clasp: Thread a crimp bead onto one end of the wire, then thread the clasp. Loop the wire back through the crimp bead and use the crimping tool to secure it.
- String Beads: String your beads onto the wire in the desired pattern. Use 0.014 inch wire for small, lightweight beads, 0.018 inch wire for medium beads, and 0.024 inch wire for heavy or large beads. Add bead caps or spacer beads if you like.
- Attach Other End: Once all beads are strung, thread a crimp bead onto the wire, then the other part of the clasp. Loop the wire back through the crimp bead and a few adjacent beads. Use the crimping tool to secure it and trim any excess wire.
- Secure and Wear: Check the bracelet for security and wear your beautiful new bracelet.
4. Leather Bracelets
Leather bracelets offer a rustic and chic look, perfect for casual and boho styles.
Materials Needed:
- Leather cord
- Beads with large holes
- Scissors
- Clasp or adjustable knot
- Optional: Charms, pendants
Steps:
- Cut Leather: Measure your wrist and cut a piece of leather cord about 4 inches longer than your wrist size.
- String Beads: String beads with large holes onto the leather cord. Add any charms or pendants if you like.
- Create Closure: You can finish the bracelet with a clasp or create an adjustable knot. For a clasp, attach it to both ends of the cord. For an adjustable knot, tie the ends in a way that allows you to adjust the bracelet’s size.
- Trim Excess: Trim any excess leather cord.
- Enjoy Your Bracelet: Wear and enjoy your handmade leather bracelet.
Conclusion
Creating bracelets with different materials allows you to explore various styles and techniques. Whether you choose elastic, memory wire, stringing wire, or leather, each method offers unique benefits and endless design possibilities. At Cherry Tree Beads, we provide all the supplies you need to bring your jewelry-making ideas to life. Happy crafting!
Recent Posts
-
Evil Eye Beads: Meaning, History, and How to Use Them
Evil eye beads might look like simple little circles of color, but they carry thousands of years of …Nov 19th 2025 -
Holiday-Making Handmade Gifts From the Heart
There’s something special about making gifts by hand during the holidays, isn’t there? Instead of ru …Nov 12th 2025 -
Our Favorite Gemstones for Fall
There’s just something magical about fall - the crisp air, the cozy sweaters, the golden glow of ch …Oct 17th 2025

